Install ZipVoice TTS on Windows with Conda
Introduction
ZipVoice is a series of fast and high-quality zero-shot TTS models based on flow matching.
GitHub: https://github.com/k2-fsa/ZipVoice
ONNX: https://github.com/thewh1teagle/zipvoice-onnx
Hugging Face: https://hf.co/k2-fsa/ZipVoice
Demo: https://zipvoice.github.io
Paper: https://arxiv.org/abs/2506.13053
Audio Samples: https://zipvoice.github.io
Prerequisites
System requirements:
- Operating System: Windows 10/11 (64-bit), macOS, or Linux (Debian/Ubuntu).
- Python: version >= 3.10 required
- Disk Space: 10GB+ recommended (for dependencies and model cache). At least 400 MB for Miniconda; 3 GB+ for full Anaconda.
- The GPU is optional but HIGHLY Recommended for Performance
- Internet: For downloading dependencies and models from Hugging Face Hub.
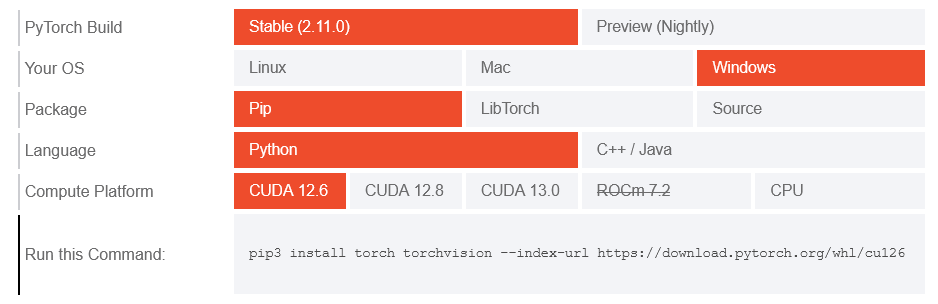
| Environment | Run this Command |
|---|---|
| CPU only | pip3 install torch torchvision |
| CUDA 11.8 | pip3 install torch torchvision torchaudio –index-url https://download.pytorch.org/whl/cu118 |
| CUDA 12.1 | pip3 install torch torchvision torchaudio –index-url https://download.pytorch.org/whl/cu121 |
| CUDA 12.6 | pip3 install torch torchvision torchaudio –index-url https://download.pytorch.org/whl/cu126 |
| CUDA 12.8 | pip3 install torch torchvision torchaudio –index-url https://download.pytorch.org/whl/cu128 |
| CUDA 13.0 | pip3 install torch torchvision torchaudio –index-url https://download.pytorch.org/whl/cu130 |
Note: CUDA version check by command
nvidia-smi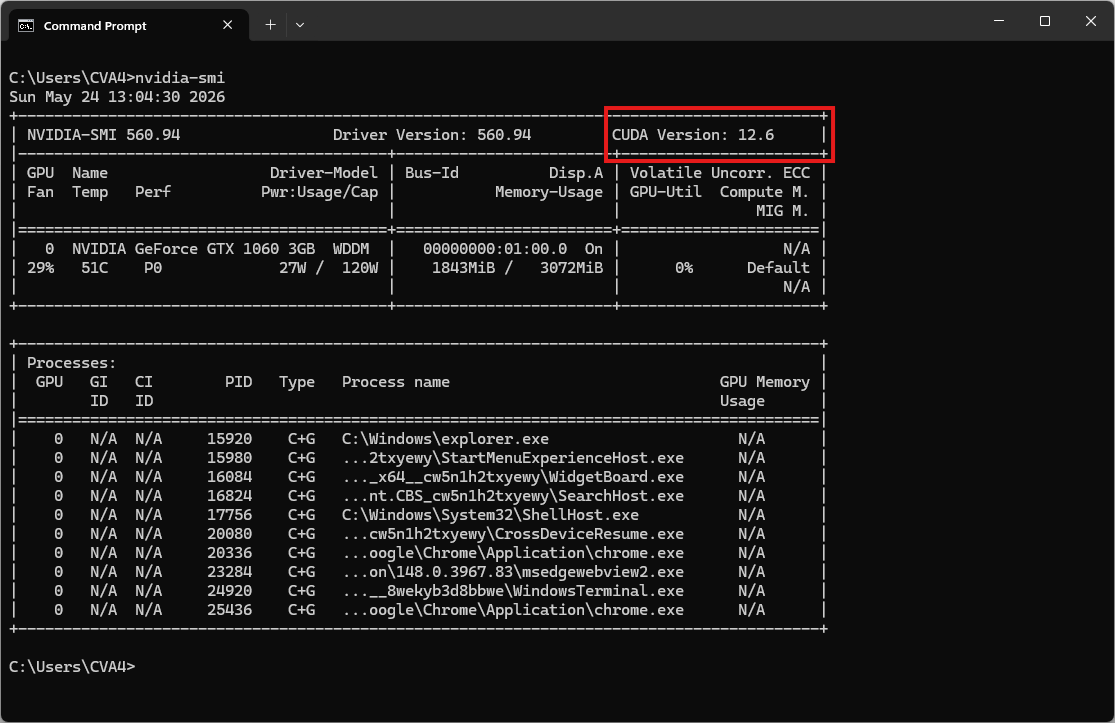
Video tutorial
Step 1. Install Miniconda Package
Download Miniconda: https://www.anaconda.com/download/success?reg=skipped
Direct link: https://anaconda.com/api/installers/Miniconda3-latest-Windows-x86_64.exe
Step 2. Create Conda Environment
Create a conda environment:
name: zipvoice
channels:
  - conda-forge
  - defaults
dependencies:
  # Python version
  - python=3.11

  # Install FFmpeg for torchaudio library
  - ffmpeg

  - pip
  - pip:
      # PyTorch CUDA 12.6 wheels
      - --extra-index-url https://download.pytorch.org/whl/cu126
      - torch
      - torchaudio
      - torchcodec

      # Core dependencies
      - numpy
      - lhotse
      - huggingface_hub
      - safetensors
      - urllib3
      - tensorboard
      - vocos
      - pydub

      # Normalization
      - cn2an
      - inflect

      # Tokenization
      - jieba
      - pypinyin

      # piper_phonemize wheel cho Windows
      - --find-links https://k2-fsa.github.io/icefall/piper_phonemize.html
      - piper_phonemize

      # Pin setuptools to avoid build errors with older packages
      - "setuptools<81"
Activate conda environment:
conda env create -f environment.yml
conda activate zipvoice
Clone and install ZipVoice from source (run after activating the environment)
git clone https://github.com/k2-fsa/ZipVoice.git
cd ZipVoice
Download the reference audio
curl -L -O "https://github.com/thewh1teagle/zipvoice-onnx/releases/download/model-files-v1.0/prompt_english_female1.wav"Reference audio sample voice: prompt_english_female1.wav
Step 3. Run the Inference
Inference of a single sentence
python -m zipvoice.bin.infer_zipvoice --model-name zipvoice --prompt-wav prompt_english_female1.wav --prompt-text "In order to win, you must expect to win." --text "I am the text to be synthesized." --res-wav-path result.wavThe result will be the audio file result.wav
Install k2 for training or efficient inference
k2 is necessary for training and can speed up inference. Nevertheless, you can still use the inference mode of ZipVoice without installing k2.
Note: Make sure to install the k2 version that matches your PyTorch and CUDA version. For example, if you are using pytorch 2.5.1 and CUDA 12.1, you can install k2 as follows:
pip install k2==1.24.4.dev20250208+cuda12.1.torch2.5.1 -f https://k2-fsa.github.io/k2/cuda.htmlPlease refer to https://k2-fsa.org/get-started/k2/ for details. Users in China mainland can refer to https://k2-fsa.org/zh-CN/get-started/k2/.
- To check the k2 installation:
python3 -c "import k2; print(k2.__file__)"