Install Breeze TTS 2 on Windows with Conda
Introduction
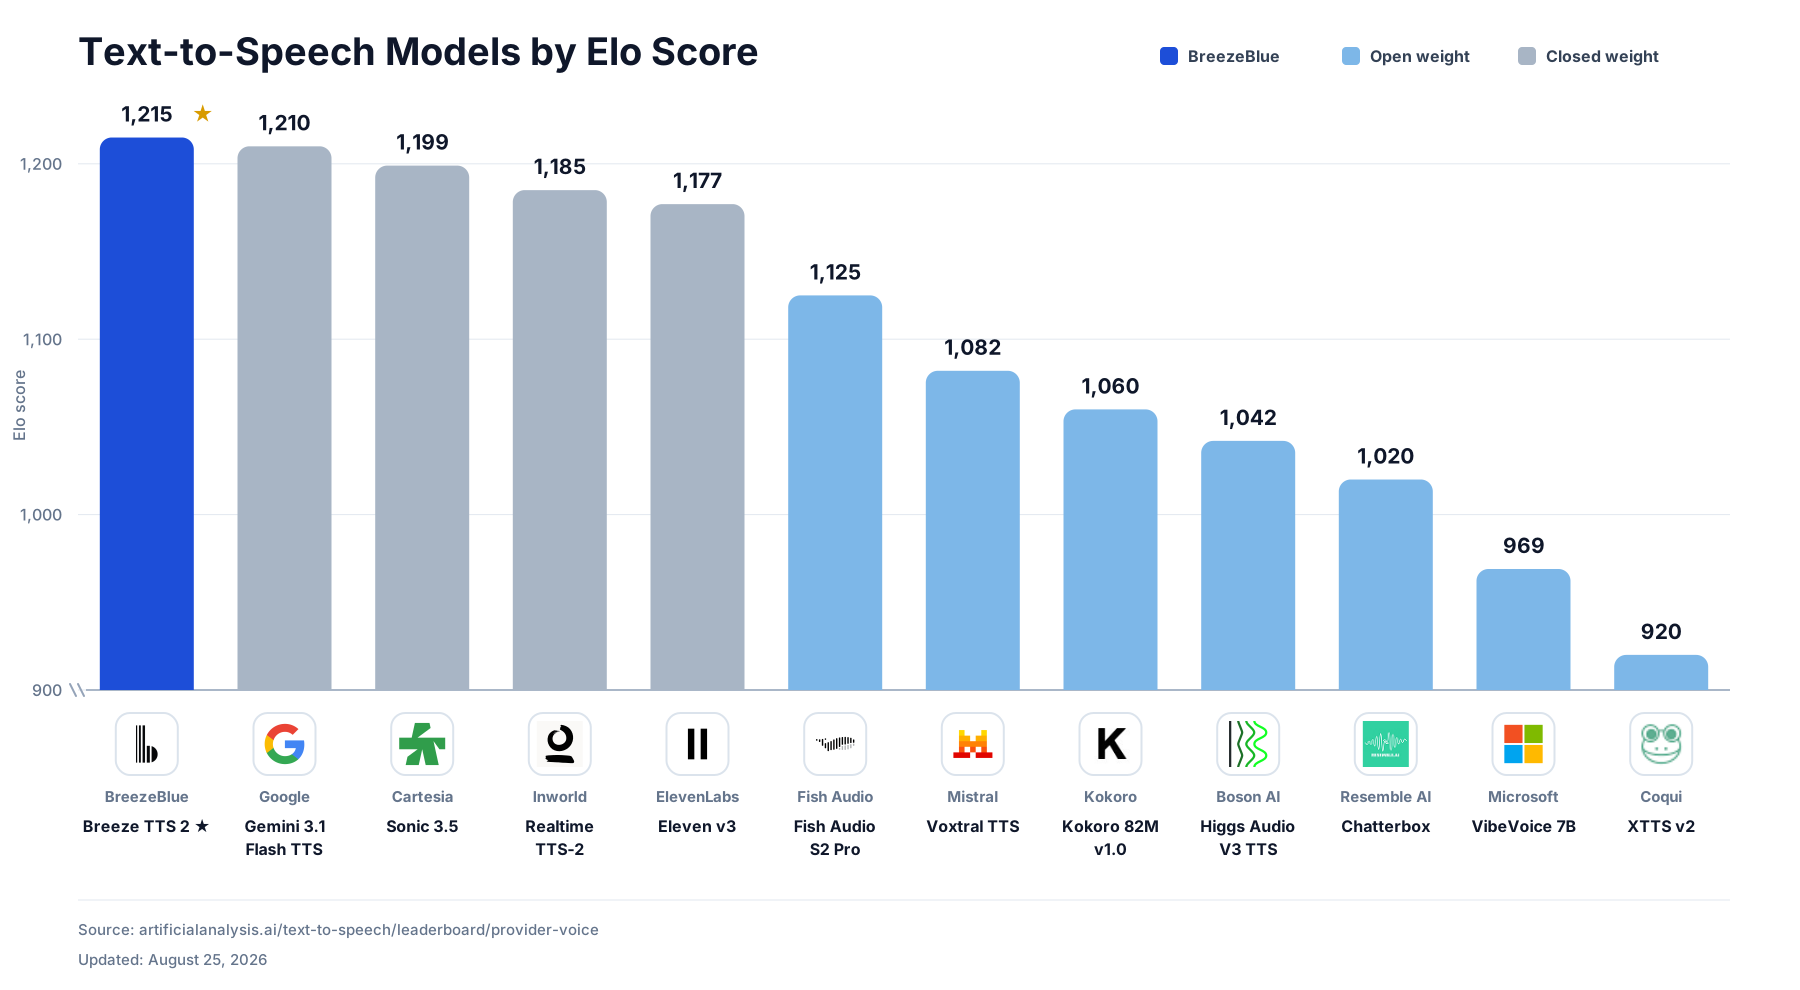
Breeze TTS 2 is an open-weight text-to-speech model built for real-time interaction. It ranks #1 among open-weight models on the Artificial Analysis TTS leaderboard, while outperforming frontier proprietary systems. Its open-ended natural-language instruction-following capability supports reference-free voice design and reference-guided voice direction, while ultra-low-latency streaming enables responsive, expressive interaction.
GitHub: https://github.com/breezeblue-ai/breeze-tts
Hugging Face: https://hf.co/BreezeBlue/Breeze-TTS-2
Website: https://breezeblue.ai
Prerequisites
System requirements:
- Operating System: Windows 10/11 (64-bit), macOS, or Linux (Debian/Ubuntu).
- Python: version >= 3.10 required
- Disk Space: 10GB+ recommended (for dependencies and model cache). At least 400 MB for Miniconda; 3 GB+ for full Anaconda.
- The GPU is optional but HIGHLY Recommended for Performance.
- Internet: For downloading dependencies and models from Hugging Face Hub.
| Environment | Run this Command |
|---|---|
| CPU only | pip3 install torch torchvision |
| CUDA 11.8 | pip3 install torch torchvision torchaudio –index-url https://download.pytorch.org/whl/cu118 |
| CUDA 12.1 | pip3 install torch torchvision torchaudio –index-url https://download.pytorch.org/whl/cu121 |
| CUDA 12.6 | pip3 install torch torchvision torchaudio –index-url https://download.pytorch.org/whl/cu126 |
| CUDA 12.8 | pip3 install torch torchvision torchaudio –index-url https://download.pytorch.org/whl/cu128 |
| CUDA 13.0 | pip3 install torch torchvision torchaudio –index-url https://download.pytorch.org/whl/cu130 |
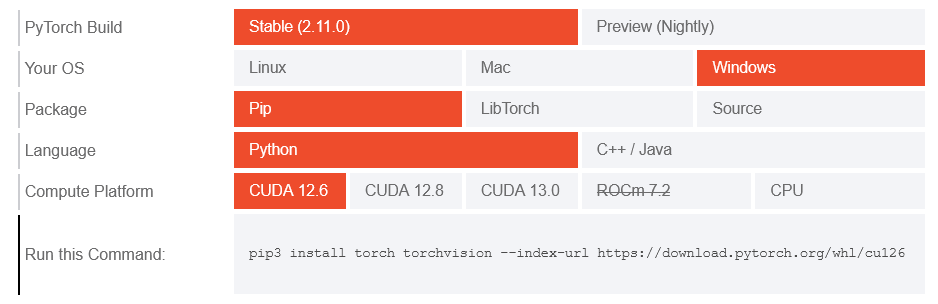
Note: CUDA version check by command
nvidia-smi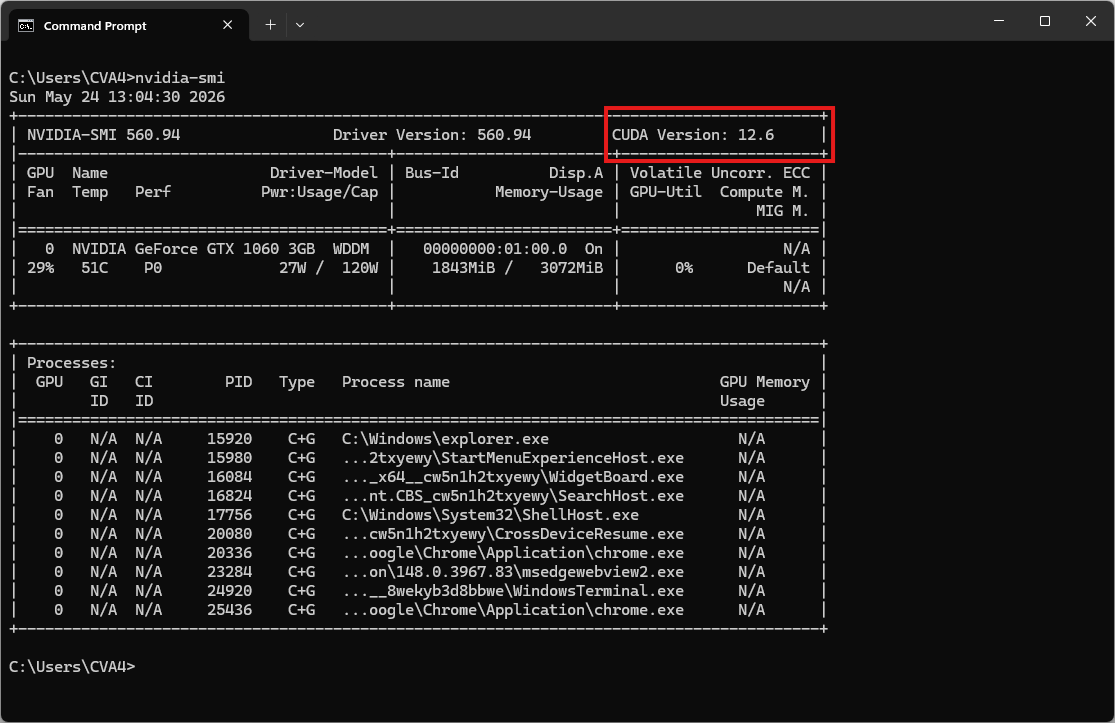
Video tutorial
Coming soon!
Step 1. Install Miniconda Package
Download Miniconda: https://www.anaconda.com/download/success?reg=skipped
Direct link: https://anaconda.com/api/installers/Miniconda3-latest-Windows-x86_64.exe
How to Install Miniconda on Windows
Step 2. Create Conda Environment
Create a conda environment:
name: breezetts
channels:
  - conda-forge
  - defaults
dependencies:
  # Python version (requires >= 3.10)
  - python=3.10

  - pip
  - pip:
      # This is the PyTorch CUDA 12.6 wheels.
      - --extra-index-url https://download.pytorch.org/whl/cu126
      - torch
      - torchaudio

      # Install the dependencies for Breeze TTS 2
      - qwen-tts==0.1.1
      - transformers==4.57.3
      - numpy>=2.0
      - soundfile>=0.13
      - fastapi>=0.115
      - uvicorn>=0.30
      - python-multipart>=0.0.18
      - pytest>=8.0
      - ruff>=0.12

      # Download the model from Hugging Face / ModelScope
      - huggingface_hub
      - modelscope
Activate conda environment:
conda env create -f environment.yml
conda activate breezetts
Clone BreezeTTS from source (run after activating the environment)
git clone https://github.com/breezeblue-ai/breeze-tts.git
cd breeze-tts
Download the weights
🤗 HuggingFace
hf download BreezeBlue/breeze-tts-2 --local-dir ..\breeze-tts-2🤖 ModelScope
# AuK-Base
modelscope download --model BreezeBlue/breeze-tts-2 --local_dir ..\breeze-tts-2
Download the reference audio
curl -L -O "https://r.breeze.blue/blog/tts2/multilingual-en.mp3"The expected directory structure is:
breeze/
├── breeze-tts/
│   └── multilingual-en.mp3
├── breeze-tts-2/
└── environment.yml
Step 3. Run the Inference
Now, run the basic example script to synthesize speech:
python infer.py ../breeze-tts-2 --ref-audio multilingual-en.mp3 --ref-text "Every journey finds its meaning when someone dares to take the first step." --text "(sigh) It is good to hear your voice again after all this time." --output outputs/voice_clone_en.wavThe result will be the audio file voice_clone_en.wav
Streaming API
Start the single-concurrency streaming API. It uses the same PyTorch runtime and eager execution by default:
python -m breeze_infer.api ../breeze-tts-2 --host 0.0.0.0 --port 7860Send a Voice Direction request with reference audio and CFG 4:
curl -X POST http://127.0.0.1:7860/v1/audio/speech \
  -F "cfg_scale=4" \
  -F "ref_audio=@reference.wav" \
  -F "ref_text=This is the exact transcript of the reference audio." \
  -F "text=(clears throat) We need to discuss what happened last night." \
  -F "instruction=Speak slowly with a restrained, serious tone." \
  -F "seed=42" \
  --output voice_direction.pcm
The response is streaming mono 24 kHz signed 16-bit little-endian PCM. Start the API with --fast-all to enable the fast path.
Reference: